What is XAMPP?
XAMPP full form is Cross Platform(X), Apache (A), MySQL (M), PHP (P) and Perl (P).
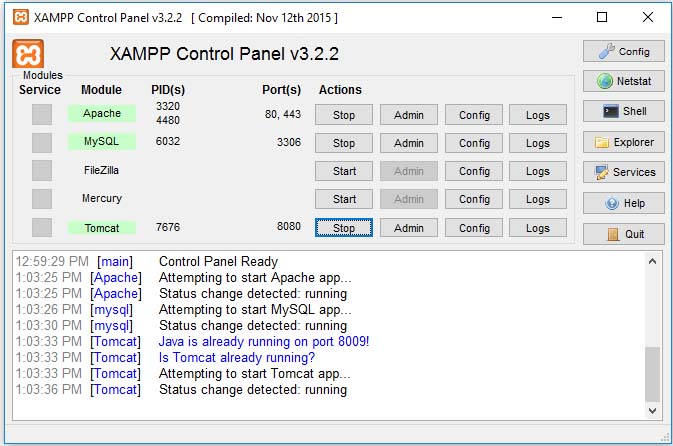
XAMPP Control Panel allows use to Start and Stop Module services
XAMPP has following modules
- Apache
- MySql
- FileZilla
- Mercury
- Tomcat
To run PHP files we have to start Apache server. To access MySql Database we start MySql Services.
Similar way to run Java web applications (war files) XAMPP included Tomcat Server
Tomcat is a developed by Apache so XAMPP also included this.
Create a WAR File in NetBeans
- Create a new web Project
- Clean and build the project
This will create a war file.
We have create a war file a.war and now want to run in tomcat server provided with XAMPP.
We created war file using netbeans IDE there are many IDE available for java/j2ee you can easily choose any one of them
You can dowload XAMPP from here
I have developed a jsp servlet application in netbeans8.2 I want to give this code to UI developer to enhance the UI.
On his/her laptop they don’t use netbeans IDE. They have to work only with jsp files.
so how to run apache tomcat server in xampp ?
Lets see step by step how to configure war file with database in XAMPP
How to start Localhost PhpMyAdmin | Localhost/Phpmyadmin/
XAMPP Start/ Stop Modules
click on start to start Xampp Server’s Apache, MySql and Tomcat module here tomcat is not dependent on Apache or Mysql.
If your war is using mysql then you have to start mysql server and if you are using phpMyAdmin for MySql then Apache is needed
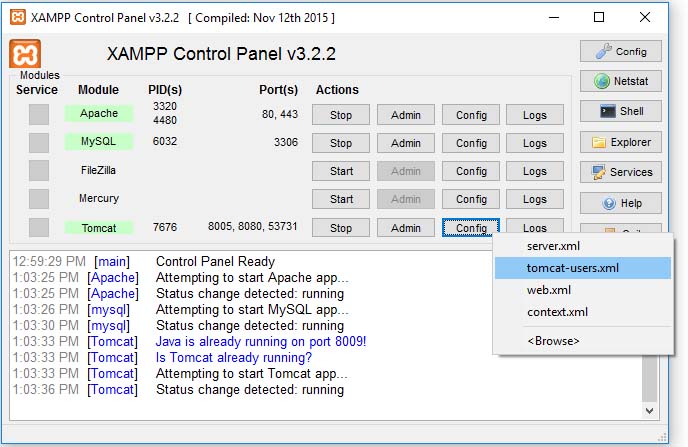
Add a Tomcat user in tomcat-users.xml
click on config you will get a drop down menu on that menu second option is tomcat-users.xml click on that
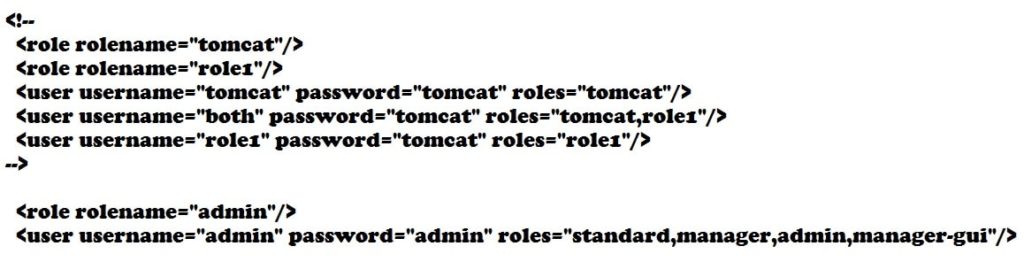
above file will open on notepad there find
1 2 3 4 5 6 7 | <!-- <role rolename="tomcat"/> <role rolename="role1"/> <user username="tomcat" password="tomcat" roles="tomcat"/> <user username="both" password="tomcat" roles="tomcat,role1"/> <user username="role1" password="tomcat" roles="role1"/> --> |
the symbol <!– and –> is xml comment content written inside this is example of creating user with password and roles.
We have to create a user to manage tomcat page to deploy projects for that we create a user admin with password admin and with different roles as below.
Copy and paste this user detail after the comment line in tomcat-users.xml file as below
1 2 | <role rolename="admin"/> <user username="admin" password="admin" roles="standard,manager,admin,manager-gui"/> |
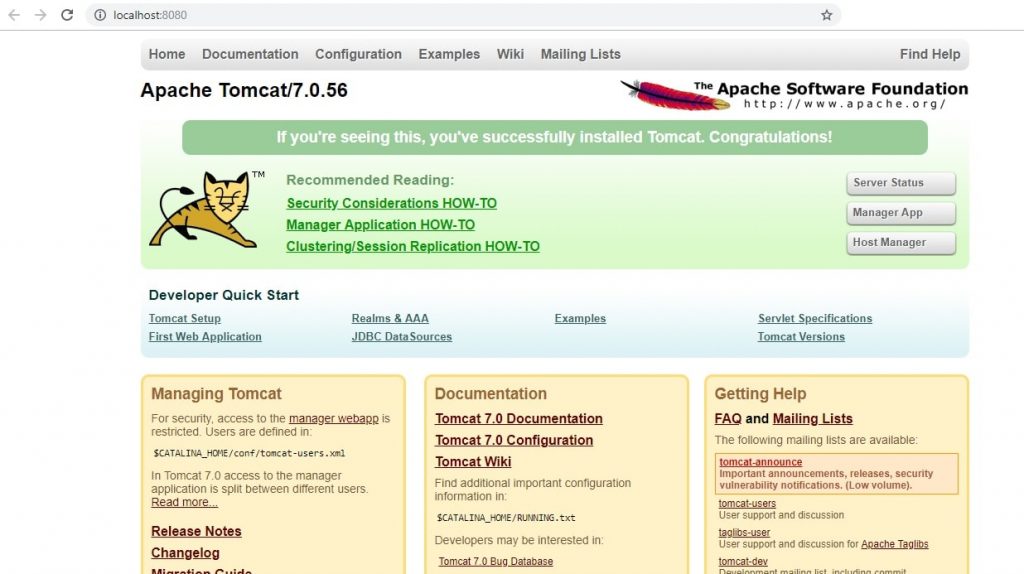
Next click on Admin it will open Apache Tomcat in web browser as below
On click on manage app a popup box will open and ask for user username and password we have provided username admin and password admin provide detail in popup window.
after authentication it will show page as below
below this page there are option to upload a directory or war file in tomcat use WAR file to deploy option and select war file and click on deploy
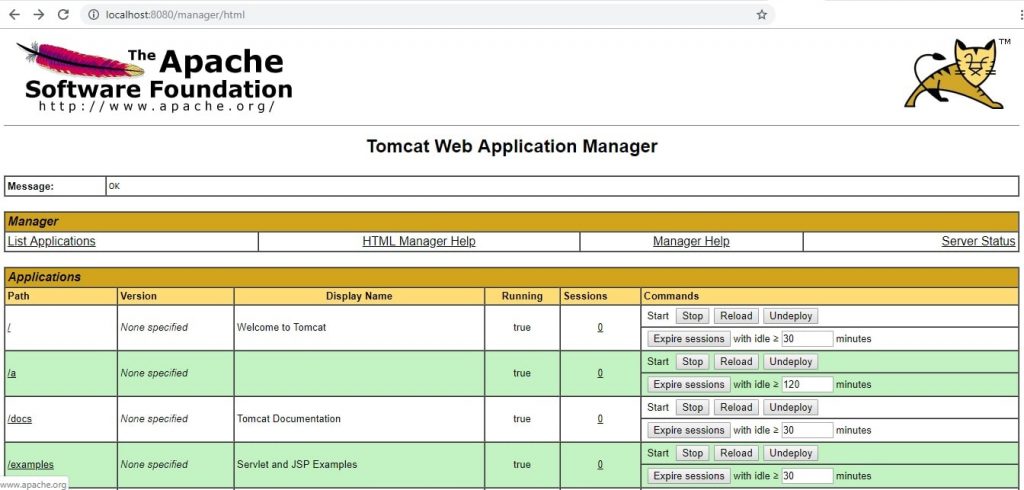
After click on uplaod it will upload war file and show uploaded war in application manager as below

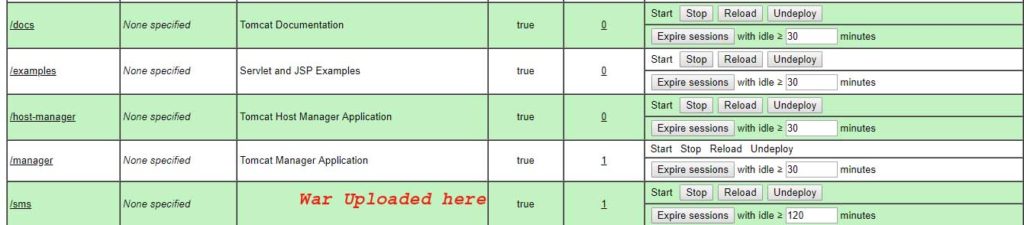
click on you war filename to run it.
Thats it 🙂
Read More